Week 8: Gentle Unwinding Yoga Sequence
This week’s sequence is designed to softly release built-up tension while restoring ease in both body and breath. Easy Seat with Side Bends opens the rib cage and side body, creating more space for fuller, calmer breathing. The seated twist gently wrings out the spine, supporting digestion and helping the nervous system reset through slow, mindful rotation. The forward fold invites deep surrender, using long exhales to quiet the mind and release tension held in the back, hips, and neck. Together, these movements encourage grounding, spinal mobility, and emotional release—making this sequence ideal for moments when you need to slow down, reconnect inward, and gently unwind.
This asana sequence is designed for beginners.
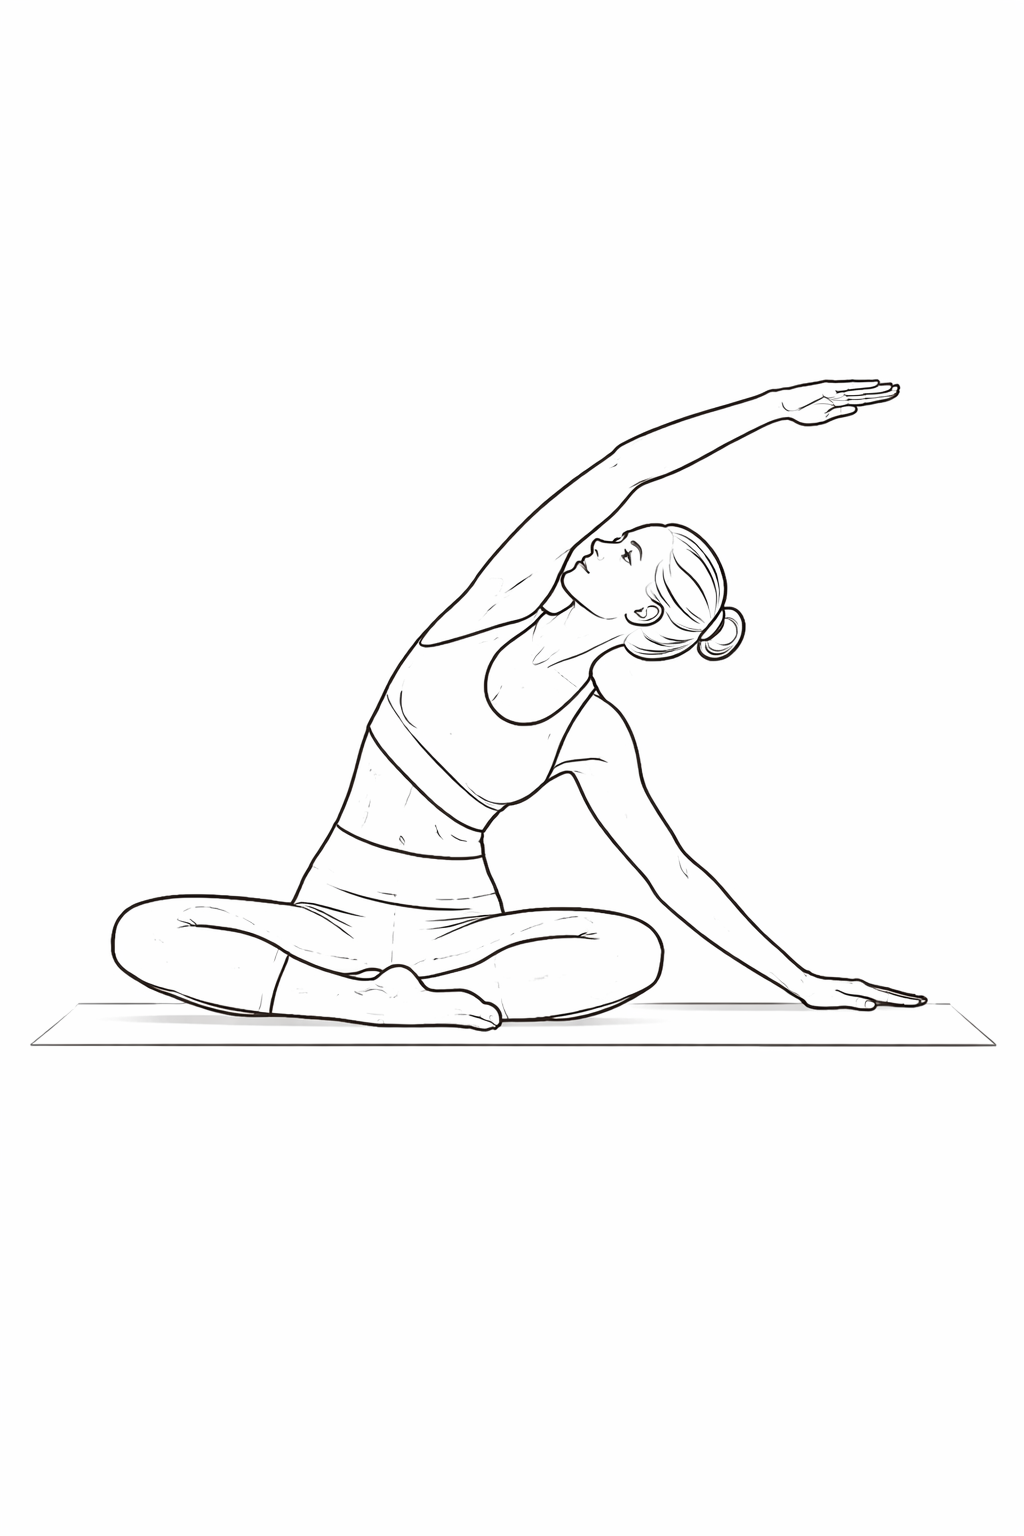
Seated Side Stretch (Seated Side Bend)
Step-by-step
Sit tall on the mat (cross-legged, kneeling, or legs extended—any is fine).
Ground both sit bones. If your hips feel tight, sit on a folded blanket.
Place your left hand on the floor beside you (or on a block).
Inhale: sweep your right arm up alongside your ear, lengthen through your waist.
Exhale: lean gently to the left, reaching the right arm overhead to create a long line from hip to fingertips.
Keep both sit bones grounded—don’t let one pop up.
Stay for 3–5 breaths, then inhale back to center and switch sides.
Breath cues
Inhale: grow taller first.
Exhale: deepen the side stretch (tiny bit more, not forced).
Alignment cues
Keep chest open (avoid folding forward).
Neck relaxed; gaze forward or slightly down.
Common fixes
If the shoulder feels tight, bend the elbow at the top or place the top hand behind your head.
If you’re tipping: widen your base (uncross legs a bit) or use a block under the supporting hand.
Seated Twist (simple seated spinal twist)
Breath cue: Inhale, lengthen, exhale, twist gently.
Sit on the floor (or a folded blanket) with legs extended. Sit tall.
Bend your right knee and place your right foot outside your left thigh.
Option: keep the left leg straight, or bend the left knee if that’s more comfortable.
Inhale: reach the crown up—lengthen your spine.
Place your right hand behind you for light support.
Bring your left elbow to the outside of your right knee (or hug your knee with your left arm—gentler).
Exhale: begin a slow, gentle twist from the ribs—no yanking. Keep shoulders relaxed.
Keep breathing:
Inhale: grow taller (create space between vertebrae).
Exhale: twist a tiny bit more, staying easy and pain-free.
Hold for 4–6 breaths, then unwind on an inhale and switch sides.
Quick tip: Think “tall first, twist second.” If your back feels pinched, reduce the twist or sit on a cushion.
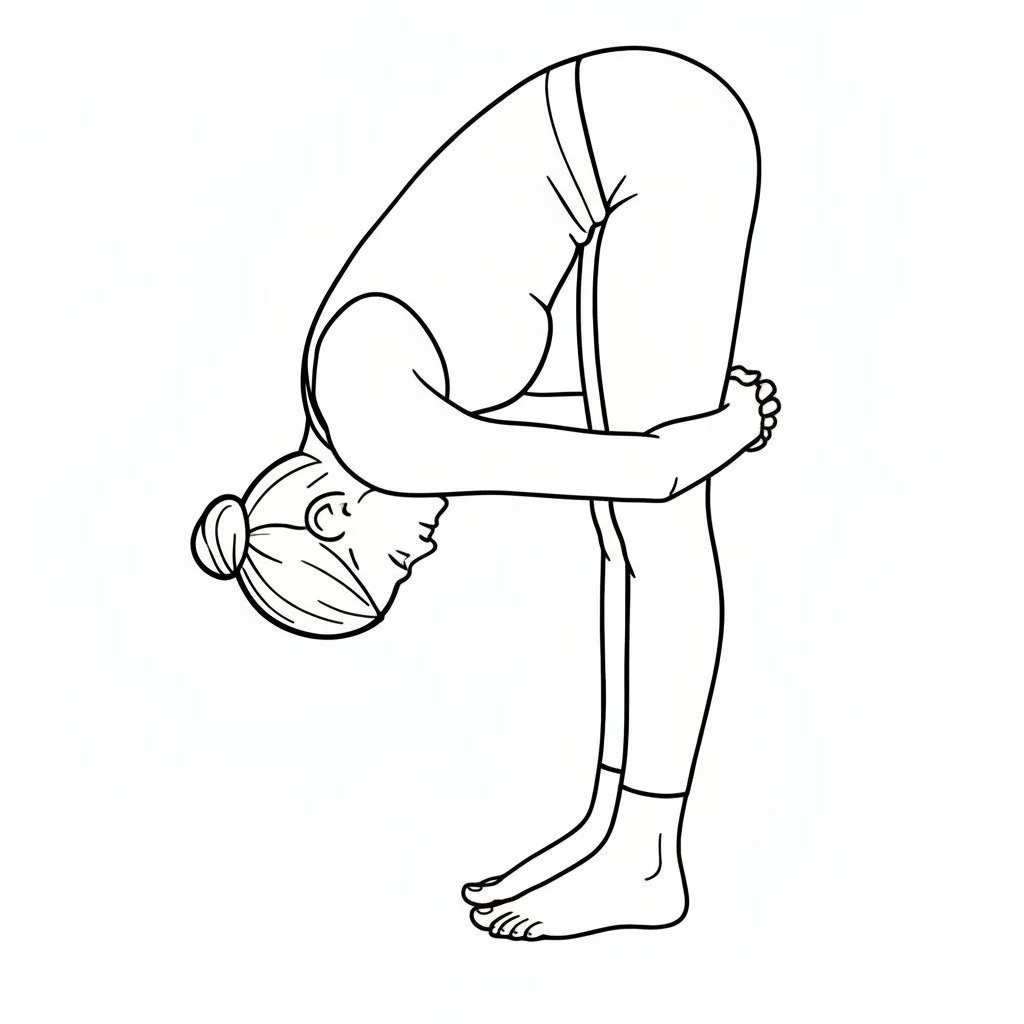
Forward Fold (Uttanasana)
Start in Mountain Pose
Stand tall, feet hip-width (or together if that feels stable).
Spread your toes, press evenly through all four corners of your feet.
Inhale: lengthen
Place your hands on your hips or raise your arms.
Lift through your chest and lengthen your spine.
Exhale: hinge at your hips
Bend your knees a lot (this protects your lower back and hamstrings).
Tip your pelvis forward like you’re closing a door with your hips.
Keep your spine long as you fold.
Let your upper body hang
Bring hands to shins, ankles, the floor, or blocks—wherever you can reach without rounding hard.
Relax your neck; your head can be heavy.
Find the “right” shape
Keep knees bent until you feel your belly touch your thighs (or close).
Then, if you want more stretch, slowly straighten your legs only as much as your spine can stay long.
Weight stays slightly toward the balls of the feet, but heels stay grounded.
Hold and breathe (20–60 seconds)
Inhale: feel your back body expand.
Exhale: soften your shoulders, jaw, and belly.
Come up safely
Bend your knees.
Hands to shins and half-lift to a flat back (optional).
Then press through your feet and rise slowly, stacking your spine, head comes up last.
Alignment Checklist
Hinge from the hips, not just rounding the back
Knees can be bent (that’s correct, not “cheating”)
Neck relaxed, shoulders away from ears
Even weight in feet; don’t tip onto the outer edges
Easier modifications (still count!)
Hands on blocks or a chair seat
Rag doll: feet wide, knees bent, hold opposite elbows, and sway
Wall fold: hands on wall, walk back, hinge until torso is parallel tothe floor (great for tight hamstrings)
Avoid deep folding or keep it very gentle if you have acute low-back pain, recent hamstring injury, or severe dizziness/vertigo. If you’re unsure, do the wall fold version.